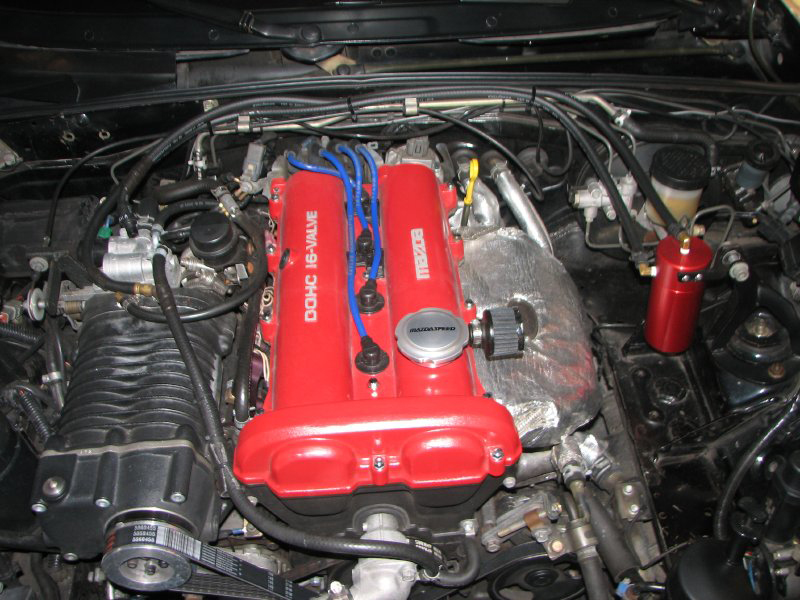


Bell Engineering Coolant Reroute
| The Shark has been running hot since the Ubercharger install a couple of years ago. I tried all the usual stuff, thicker aluminum radiator, sealing every possible opening in the mouth of the car, no thermostat, a160 degree thermostat. None of that really solved the problem. No thermostat kept the car from ever warming up on the commute to work. I bought the vented induction hood from autoknoexion, ( an incredibly nice piece ) but it rubbed the cam cover, was way too flashy for the sleeper I wanted to drive, and while it did amazing things for operating temperatures, I still couldn't cruise on the interstate with the AC on for more than a couple of minutes at a time without overheating. M-tuned introduced a coolant reroute kit that looked really slick, but the waterneck dumped out to the passenger side. That's pretty cool (pun intended) for a turbo, or a hot side supercharger, but the passenger side of the engine compartment is a little congested with a cold side like the Uber. Begi offers a different sort of system that can be made to run down the driver's side. The Uber had a ton of teething problems, and some half assed machine work that Flyin Miata blamed on Begi who actually made the Uber for Flyin Miata. Neither one was much interested in standing behind anything on the Uber, so any time since, that I have a choice of buying from someone other than FM or Begi, I've done so. But the Begi unit looked like it was well suited to what I needed in terms of drivers side plumbing. So I ordered from Begi, and away we went. | |
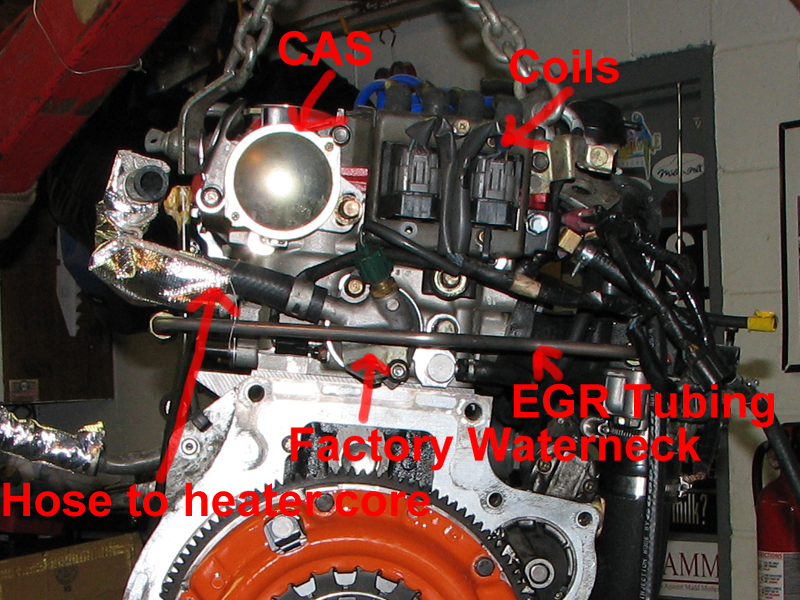
| The kit arrived quickly, and appeared to have everything it was supposed to. I started tearing things apart in the engine bay.The Crank Angle Sensor (CAS) needs to come out, to remove the CAS, the valve cover needs to come out. (On my car anyway. I've seen people pull the CAS without the valve cover, but I don't have enough firewall clearance.) Next the coils come out. I found it helpful to pull the hard plumbing for the brake booster, the accelerator cable as well as the hoses for the catch can. | |
|
|
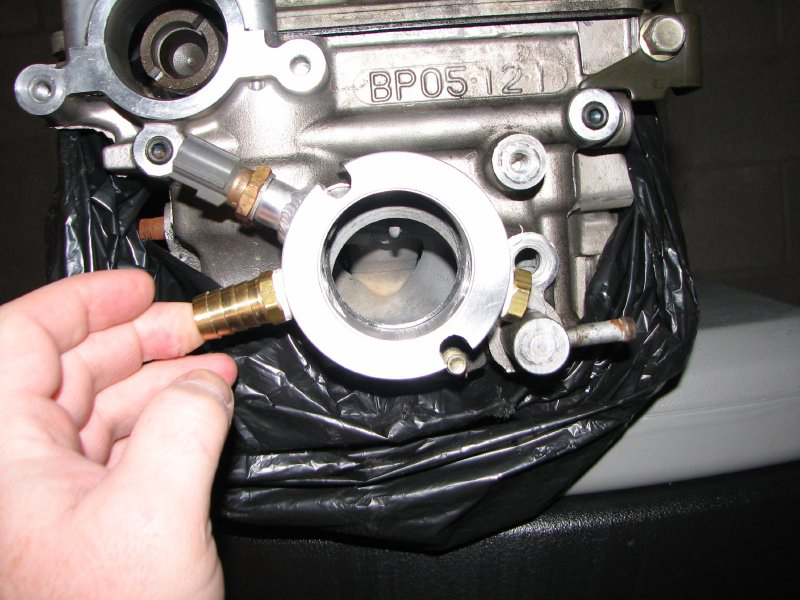
| Next I pulled the factory rear waterneck. This gives you a pretty good idea of what you're looking at. Photo is from another project. I did not remove the engine for this project. (although at times, it might have been simpler.) | |
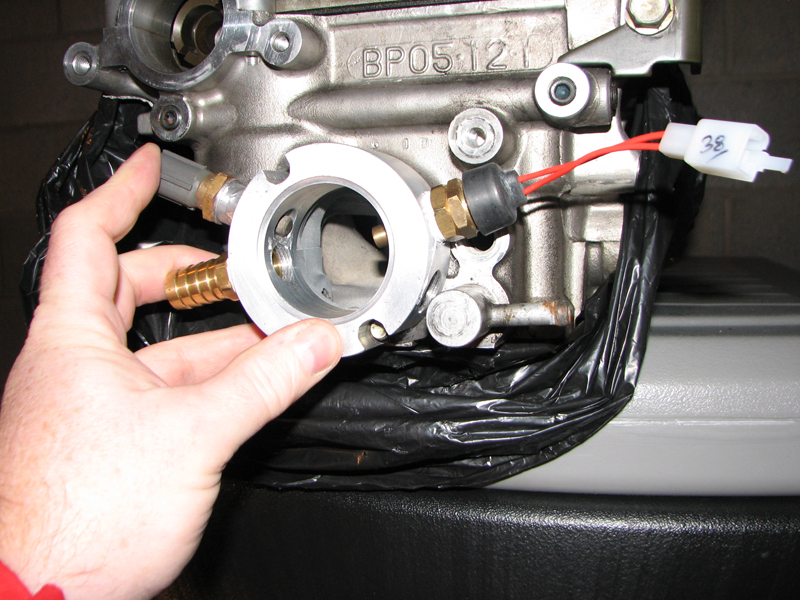
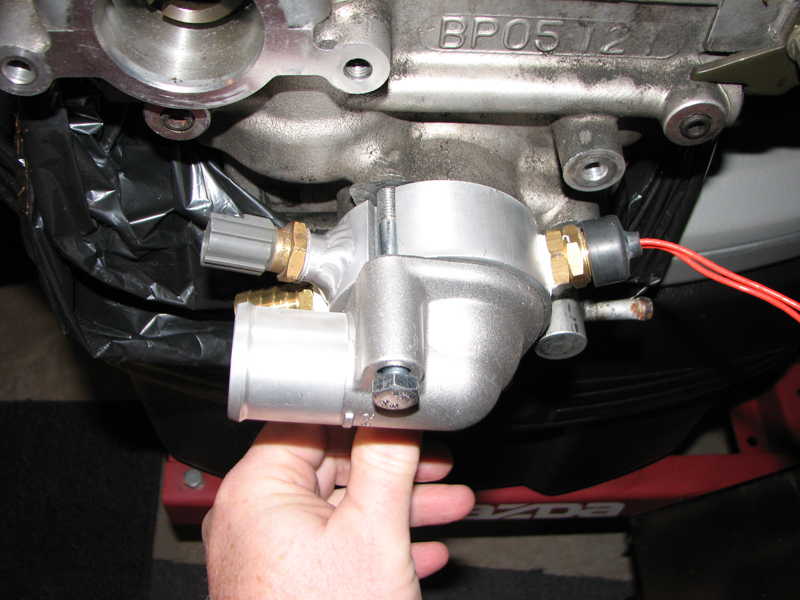
| After removing the factory water neck, and removing the lower stud that hold it in place, I test fitted the spacer from Begi. Wouldn't fit. I had a spare head that wasn't in a car, and tried to see why it wouldn't fit. | |
| I emailed Begi, and explained that the bung that was drilled in the 4 O'clock position wouldn't clear the fitting heading the oil cooler. They sent me a new one with a port drilled at 3 O'clock, which would allow me to use my aftermarket water temp sensor, but it still had the port at 4 O'clock, which with a plug, still wouldn't clear the fitting on the head. I figured I could either spend another week playing back and forth with Begi, or order a plug that fits inside the spacer from McMaster Carr, and get on with my life. ordered a plug from McMaster, 2 days later it arrived, and the spacer fit wonderfully. | |
| The bolts provided were a tad too long. The longest one bottomed out in the head before contacting the waterneck.Hacksaw and a thread die fixed that problem. Space was at a real premium getting the spacer/thermostat/waterneck combo bolted to the head. I found that disconnecting the speedomoter cable from the transmission, and pulling it up into the engine compartment got it out of the way. That made a huge difference in having room. putting the cable back after the spacer assembly was bolted in took just a couple of minutes. | |
| The tube to run from front to back that is provided was too long for running down the drivers side. So, I trimmed that with a hacksaw. Begi provides a piece of hose to run from the barbed fitting to the heater core hose and used an adaptor to compensate for the difference in hose diameter.. I had a brand new OEM heater core hose laying around that fit nicely onto the barbed fitting, so I left that part out of my setup. I was concerned about leakage doing it my way, but no problems. | |
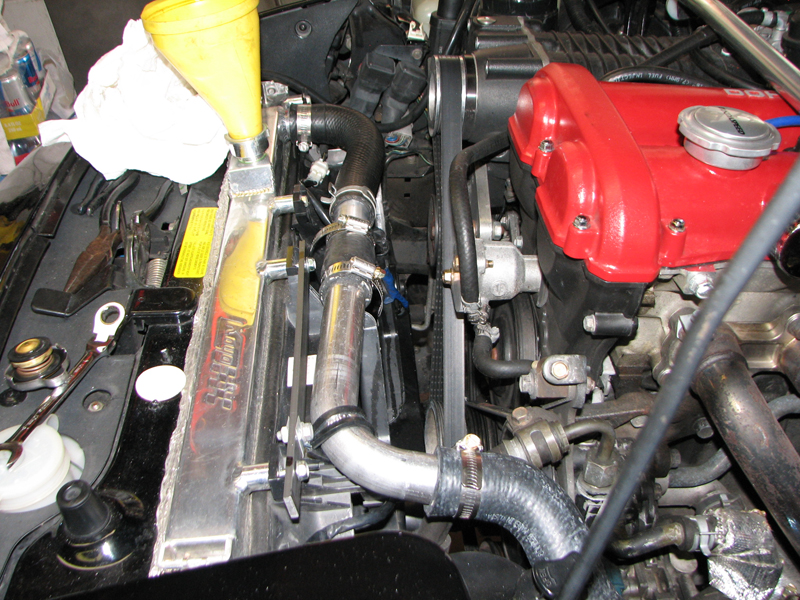
| Ran one of the 2 provided 90 degree hoses from the water neck to just under the brake booster. That 90 connects to the now shorter than original tubing which runs to the Z shaped piece also privided with the kit, that dances around the power steering pump very nicely.I was concerned about using the second 90 to make the turn toward the radiator. I've had some belts break, and when they do, they tend to break things. I carry spare belts, but really don't want to deal with a broken belt taking out a radiator hose. I poked around on the net, and found a 90 degree 1.25" metal fitting at www.circletracksupply.com part number NORZ7190 which completed the journey from the back of the head to the radiator.The use of a metal 90 instead of a hose 90 also gave me something strong to anchor the whole front assembly with. A scrap piece of aluminum bar drilled out and bolted to the radiator. I've added a second clmp near the center of the radiator since this picture was taken. | |